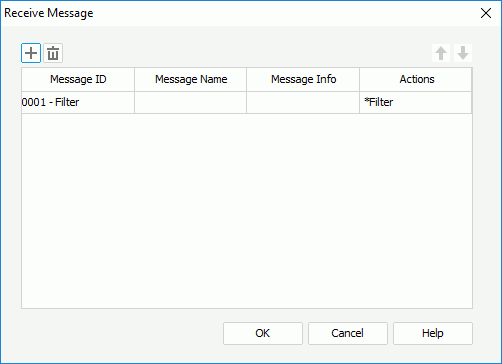
Receive Message Dialog Box
You can use the Receive Message dialog box to define the messages the current data component is going to receive at runtime and specify the actions to be triggered as a response to each of the messages. This topic describes the options in the dialog box.
Designer displays the Receive Message dialog box when you right-click a table, chart, crosstab, KPI, or geographic map in a library component and select Receive Message from the shortcut menu.

Designer displays these options:
 Add button
Select to add a new message line.
 Remove button
Select to delete the specified message line.
 Move Up button
Select to move the specified message line higher in the list.
 Move Down button
Select to move the specified message line lower in the list.
Message ID
This column shows the ID of the messages that you add for the data component to receive. You can select the ID from the drop-down list or type it in the text box manually.
Message Name
This column shows the names of the messages that you add for the data component to receive.
Message Info
Designer enables this column when you select Message ID of "0003 - Parameter". You need to choose a message type from the Message Info column: Automatic or Customized.
Actions
This column shows the actions that you specify for the data component to respond for each message. To edit the conditions of an action, select in the column and select the ellipsis  . Designer then displays different dialog box for you to edit the conditions of the action according to the specified message.
- When you select Message ID of "0001 - Filter", Designer displays the Filter dialog box for you to edit the filter conditions of the message.
- When you select Message ID of "0002 - Sort", Designer displays the Sort dialog box for you to edit the sort conditions of the message.
- When you select Message ID of "0003 - Parameter", Designer displays the Parameter dialog box for you to edit the parameter values in the message.
- When you select Message ID of "0004 - On-screen Filter", Designer displays the On-screen Filter dialog box for you to edit the on-screen filter conditions in the message.
- When you select a user-defined message, Designer displays the Web Action List dialog box for you to specify the action you want to trigger first.
OK
Select to apply your settings and close the dialog box.
Cancel
Select to close the dialog box without saving any changes.
Help
Select to view information about the dialog box.
 Previous Topic
 Back to top