 Previous Topic
Formatting Chart Labels
This topic describes how you can format the labels (including titles) of a chart.
In Designer, you can add as many labels as required into a chart. To add a label to a chart, right-click any chart element and select Add Label from the shortcut menu. Designer then adds a label with the text "Label" at the upper left corner of the chart platform. Drag the label to the position where you want to place it in the chart. To remove a label, right-click it and select Remove.
To format a label in a chart
- Double-click the label, or right-click the label and select Format Label from the shortcut menu. Designer displays the Format Label dialog box.
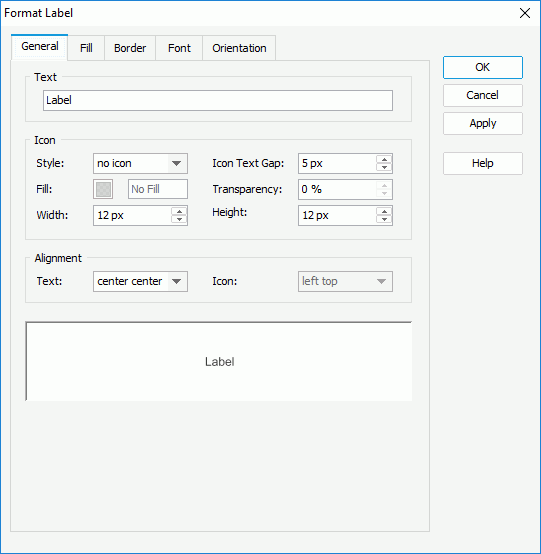
- In the General tab, specify the general properties of the label.
- In the Text box, type the text to display in the label.
- In the Icon box, select an icon style from the Style drop-down list to attach an icon to the label, then specify the distance between the icon and the label text, the color and transparency to fill the icon, and the width and height of the icon.
- In the Alignment box, specify the alignment of the text in the label, and the alignment of the icon relative to the text in the label.
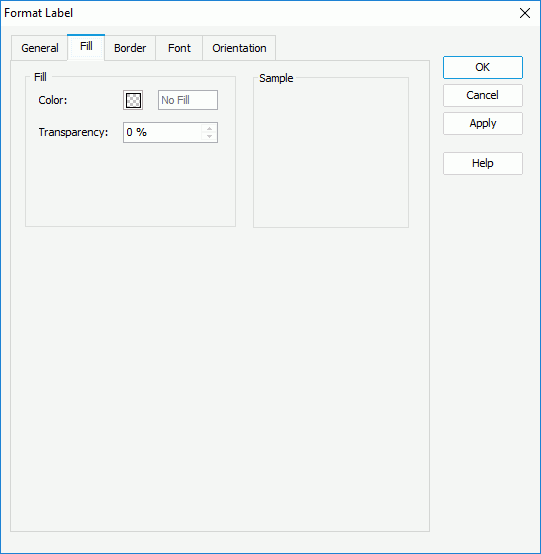
- In the Fill tab, specify the color and transparency to fill the label (to change the color, select the color indicator and select a color from the color palette, or type the hexadecimal RGB value of a color in the text box).
- In the Border tab, specify properties for the border of the label.
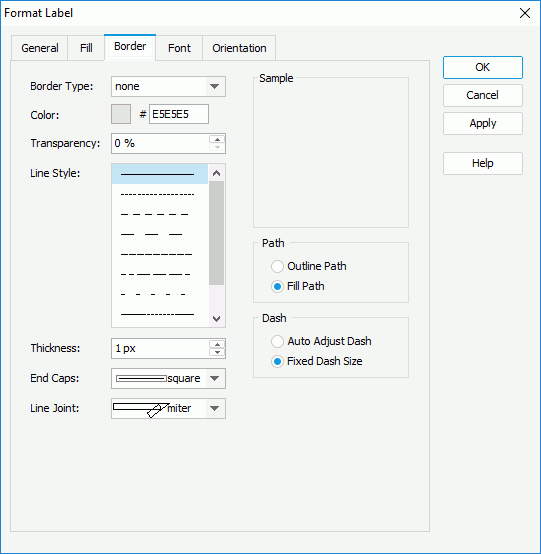
- From the Border Type drop-down list, select how you want to display the border.
- Specify the color, transparency, line style, thickness, ending style, and line joint mode of the border.
- In the Path box, specify the fill pattern of the border: Outline Path or Fill Path.
- In the Dash box, select to automatically adjust the dash size or use fixed dash size if you select a dash line style for the border.
- When you select the Line Joint option as "joint round", you can set the radius for the border joint in the Radius text box.
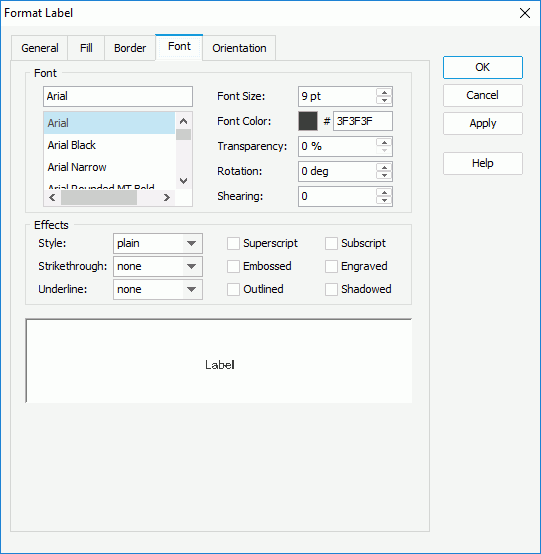
- In the Font tab, specify the font properties of the label, including the font face, size, color, transparency, rotation angle, and shearing angle. You can also apply some special effects to the label, such as italicizing the label and adding a horizontal line under the label.
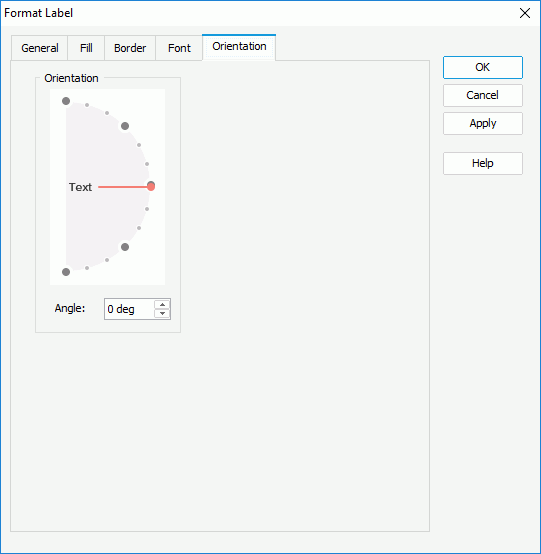
- In the Orientation tab, specify the rotation angle for the label text and the icon. You can either drag the Text hand in the Orientation box or type a value in the Angle text box to perform the operation.
- Select OK to accept the changes and close the dialog box.
 Back to top