Previous Topic
Using JavaScript API to Embed Server Console and Reports in Your Applications
This topic describes how you can embed the Report Server Console, page reports, web reports, and dashboards into your applications and then perform actions outside the report template, using Report JavaScript APIs.
This topic contains the following sections:
- Embedding the Server Console in Your Application
- Embedding Reports and Dashboards in Your Application
- Accessing Rest API via URL, Header, or SSO
- Utilizing callback Functions to Control Messages from User Applications
Embedding the Server Console in Your Application
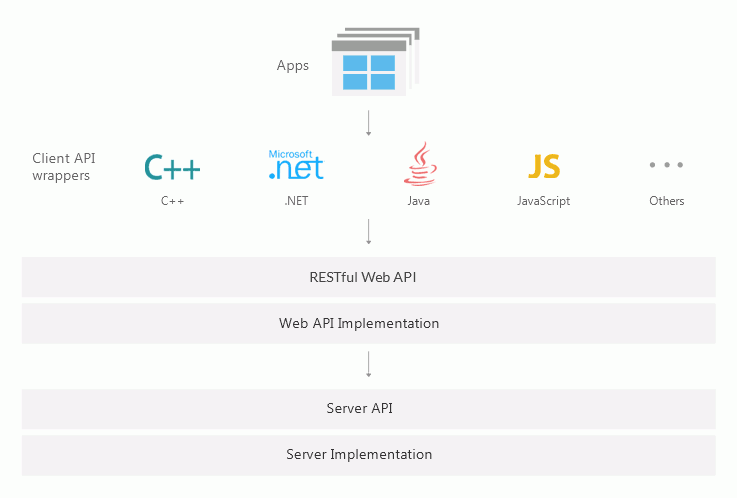
Report provides modularized RESTful Web APIs for the Server Console so that you can call these APIs to set up a similar server console as the Report Server Console in your applications on any platforms such as JavaScript, Java, .NET, and C++. RESTful Web APIs are popular and typically based on HTTP methods to access resources via URL-encoded parameters and the use of JSON or XML to transmit data. Report develops Web API definition using openAPI as the specification. You can easily generate client side APIs according to the Web API definition file logireportserver.yaml in the <install_root>\help\webapi directory. Client APIs finally call the Web APIs to a Report Server.
You can access the Web API documentation via the URL http://localhost:8888/servlet/sendfile/help/webapi/webapi-docs/index.html if you have started a local Report Server.
Report Web APIs cover these server functions:
- Signing in and out
- Sign in and out of Report Server.
- Get user session information such as username and session ID.
- Set session timeout time.
- Managing resources
- List all resources including folders, reports, library components, dashboards, and versions.
- Create folders in the server resource tree and publish resources to them.
- Get and set resource properties.
- Set and delete resource permissions.
- Get, set, and delete catalog-level, report-level, and global NLS.
- Get all resources in the server resource tree with their properties using a single call, and obtain parameter information of the resources.
- Managing business views
- List all the business views in a catalog, including the categories, group objects, aggregation objects, and detail objects in the business views.
- Get, set, and delete permissions of business views and group objects.
- Manage business views available to a report
- Get, set, and delete business view security in a catalog.
- Managing server security
- Add, remove, get, and edit users, groups, and roles; add and remove their members.
- Get, create, update, and delete organizations; get and update resource allocations of organizations.
- Scheduling report tasks and advanced running reports
- Schedule report running and bursting tasks and send reports to various locations such as the versioning system, hard drive, email addresses, printer, fax, and FTP sites. Schedule and Advanced Run support all the formats including Page Report Result, Web Report Result, HTML, PDF, Excel, Text, RTF, XML, and PostScript.
- View, enable, disable, copy, get, run, import, export, stop, and delete report tasks.
- Configuring user preferences
- Get and set server preferences.
- Get, add, edit, and delete the profiles of Page Report Studio, Web Report Studio, JDashboard, and Catalog Studio.
- Using the LDAP server
- Get and modify the LDAP server settings.
- Import users and groups from the LDAP server.
- Get and set LDAP synchronization schedule settings.
- Get, add, and modify LDAP role maps.
- Managing Triggers
You can get, create, enable, disable, and fire triggers. - Dynamic settings for catalogs
You can get, set, create, and delete dynamic connections, dynamic security, and dynamic display names for business view elements.
Report Server has already generated the client JavaScript APIs for your direct use. You can find the javascript-client-generated.zip file in the <install_root>\help\webapi\client-js directory. Extract the zip file, and you will get the javascript-client folder which contains the following: JavaScript API codes are in the src subfolder; for the files in the docs subfolder and the README file, you need to use Markdown Viewer to view them. To access the JavaScript API documents, open the index.html file in the <install_root>\help\webapi\client-js\js-docs directory.
However, for other client side APIs like Java, .NET, and C++, you need to generate them by yourself using the Web API definition file logireportserver.yaml.
You can refer to the following sample code if you have started a local Report Server: http://localhost:8888/servlet/sendfile/help/webapi/client-js/sample/index.html. You can find the complete sample materials in the <install_root>\help\webapi\client-js\sample directory. For the code details, view index.js in the src folder.
 Back to top
Embedding Report Reports and Dashboards in Your Application
With the JavaScript APIs Report provides, you can embed page reports, web reports, and dashboards into your own application and perform actions outside the report template without using Page Report Studio, Web Report Studio, or JDashboard.
You can implement JavaScript APIs in an external application and perform the following actions on the embedded reports and dashboards:
- Open
- Close
- Export
- Specify Parameter Values
- Refresh Data
- Save
- Save As
- Navigate Pages in Page Reports
For more information about the JavaScript APIs,
Integrating JavaScript APIs Into Your Environment
The JavaScript APIs that Report provides is a single JavaScript file jreportapi.js. Server created it in the <install_root>\public_html\webos\jsvm\lib directory by the JavaScript making tool. You can use the JavaScript APIs in your application in two ways.
- Deploying jreportapi.js to your application
-
Copy jreportapi.js from
<install_root>\public_html\webos\jsvm\libto a folderC:\APIin your application. - Load jreportapi.js in your HTML page:
<script id="j$vm" type="text/javascript" src="C:\API\jreportapi.js"></script>
-
Copy jreportapi.js from
- Loading jreportapi.js from a remote Report Server
Assume that Report Server is running on 192.0.0.1:8888. Then you can load jreportapi.js by setting the URL
http://192.0.0.1:8888/webos/jsvm/lib/jreportapi.jsin your HTML page:<script id="j$vm" type="text/javascript" src="http://192.0.0.1:8888/webos/jsvm/lib/jreportapi.js"></script>
Running the JavaScript API Demos
Report Server provides two JavaScript API demos in the <install_root>\public_html\webos\app\demo directory:
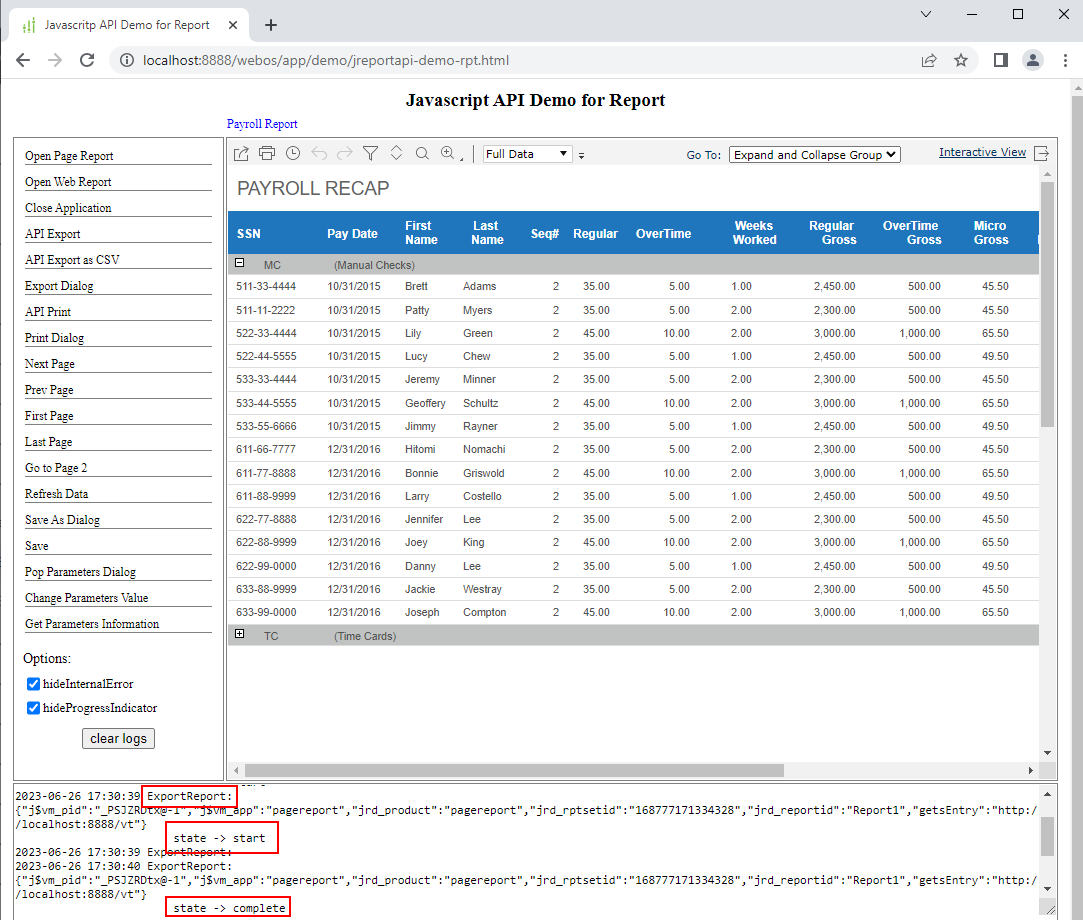
- jreportapi-demo-rpt.html for embedding a page or web report. The demo file uses an outside JavaScript file demo-rpt.js in the same folder which shows how to use Report JavaScript APIs.
- jreportapi-demo-dsb.html for embedding dashboards. The demo file uses an outside JavaScript file demo-dsb.js in the same folder which shows how to use Report JavaScript APIs.
To run the demos:
- Start your Report Server.
- Open a demo file using URL like this:
http://localhost:8888/webos/app/demo/jreportapi-demo-rpt.html
http://localhost:8888/webos/app/demo/jreportapi-demo-dsb.html - Server displays a web page. Select the Open xxx option on the left menu to load the specified report or dashboards as customized in the API.
For the dashboard demo, Server opens two dashboards and display their names above the dashboard body. You can select the names to switch between the two dashboards.
- Use the left menu to perform actions on the report or dashboards.
- If the report or dashboards has defined web controls such as filter control and custom control, they can also work.
- If there are links in the report or dashboards, after you select a link, Server displays a link path above the report body or dashboard body. You can then use the link path to go back to the previous step.
Specifying Parameter Values
When the reports or dashboards you embedded in an application use parameters, you need to specify the parameters values when running them. To apply all the values of a parameter, set the parameter value to \x07.
See the example for a page report:
thi$.openPageReport = function(entryId){

var  params1 = {
"p_Cascading-Country":"USA",
"p_Cascading-City":["New York","Los Angeles","Chicago"],
"p_Year": "\x07"
};

var app = Factory.runReport(
server, prptRes, catRes, params1, entryId);
};
After you open reports or dashboards, you can use the following API functions to get and change their parameter values.
- getParameterInfo(callback)
Get the parameters of the current report or dashboard and return an array of the parameter name and default value pair. - changeParameters(parameterInfo)
Set parameter values using the parameter parameterInfo to rerun the current report or dashboard.@param parameterInfo Array.
[
{ pname: String. The parameter name. pvalue: An array. The parameter value. For most parameter types pvalue has only one element, but a multi-valued parameter may have several elements.
ownerID: An array. The report ID or library component ID which uses the current parameter. ownerID is not necessary for reports, but you must provide it for dashboards.
} ...
]
For more information, see the Dashboard.js and ReportSet.js files in <install_root>\public_html\webos\jsvm\src\com\jinfonet\api.
Using Single Sign-on
When you embed reports or dashboards in a Single Sign-on (SSO) environment, you should specify the authorized user in your code. This section shows how to specify a user for SSO as compared to normally signing in.
For normally signing in, you set username and password as:
user: "admin",
pass: "admin",
See the example:
        var server = {
          url: "http://localhost:8888/jinfonet/tryView.jsp"
      user: "admin",
      pass: "admin",
          jrd_prefer:{
              // For page report
              pagereport:{
                  feature_UserInfoBar:false,
                  feature_ToolBar: false,
                  feature_Toolbox: false,
                  feature_DSOTree: false,
                  feature_TOCTree: false,
                  feature_PopupMenu: false,
                  feature_ADHOC: false
              },

              // For web report
              webreport:{
                  viewMode:{
                      hasToolbar: false,
                      hasSideArea: false
                  }
              }
          },
          jrd_studio_mode: "view",
          "jrs.param_page": true
      },
For SSO, use authorized_user:"user_name" to specify the authorized user:
       var server = {
        url: "http://localhost:8888/jinfonet/tryView.jsp",
        authorized_user:"admin",
        jrd_prefer:{
            // For page report
            pagereport:{
                feature_UserInfoBar:false,
                feature_ToolBar: false,
                feature_Toolbox: false,
                feature_DSOTree: false,
                feature_TOCTree: false,
                feature_PopupMenu: false,
                feature_ADHOC: false
            },

            // For web report
            webreport:{
                viewMode:{
                    hasToolbar: false,
                    hasSideArea: false
                }
            }
        },
        jrd_studio_mode: "view",
        "jrs.param_page": true
},Accessing Rest API via URL, Header, or SSO
The following example shows how you can access Report Rest API to obtain reports in a folder, by setting username and password in URL or header or using SSO.
- In the computer B with the domain name b.test.com, install Report Server to
D:\LogiReport\Server. - Compile the WebAPIExternalAuthorized.java file.
javac -classpath D:\LogiReport\Server\lib\* D:\LogiReport\Server\help\webapi\sample\WebAPIExternalAuthorized.java - Add the compiled class to the SSO.jar.
- Add the path of SSO.jar in JRServer.bat in
D:\LogiReport\Server\bin. - Add -D parameters in JRServer.bat.
-Djrs.httpExternalAuthorized=WebAPIExternalAuthorized -Djreport.server.csrf.whitelist=a.test.com - Start Report Server.
- In the computer A with the domain name a.test.com, start Internet Information Services (IIS).
- Deploy WebAPIDemo.html from
D:\LogiReport\Server\help\webapi\samplein the computer B.
- Access
http://a.test.com/webapidemo.htmlfrom any computer.
You can then operate on the page to view the six scenarios of signing in Report Server and getting nodes in a folder.
Utilizing callback Functions to Control Messages from User Applications
You can utilize callback functions to control messages from applications out of Report. The message types include error, warning, and status messages. Following is an example to handle messages by an event listener. For JavaScript API or URL, you can add an event listener to handle report messages in your main window. It's a built-in method of browser.
window.addEventListener('message', function (msg) {})You can find the sample code in <install_root>\Server\public_html\webos\app\demo\demo-rpt.js for the demo <install_root>\Server\public_html\webos\app\demo\jreportapi-demo-rpt.html:
window.addEventListener('message', function (msg) {
const dataArray = JSON.parse(msg.data)
if (dataArray[0] == '-j$vm-rpc') {
var data = dataArray[1];
var ids = Object.assign({}, data.result);
delete ids.obj;
if (data.action == 'PopMessage') {
this.log(data.action,
` ${JSON.stringify(ids)}
type -> ${data.result.obj.type}
source -> ${data.result.obj.sourceType}
errcode -> ${data.result.err}
subject -> ${data.result.obj.subject}
content -> ${data.result.obj.content}`)
}
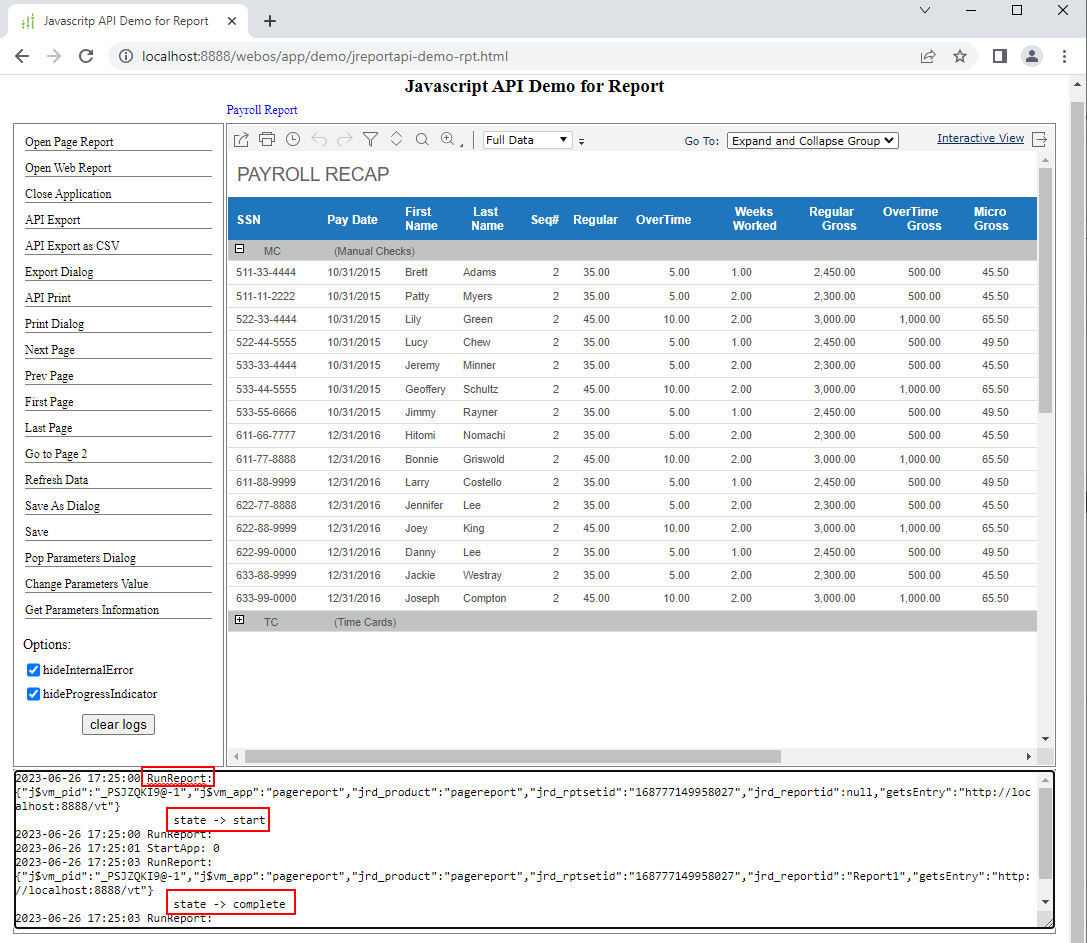
if (data.action == 'RunReport') {
this.log(data.action,
` ${JSON.stringify(ids)}
state -> ${data.result.obj.state}`)
}
if (data.action == 'ExportReport') {
this.log(data.action,
` ${JSON.stringify(ids)}
state -> ${data.result.obj.state}`)
}
}
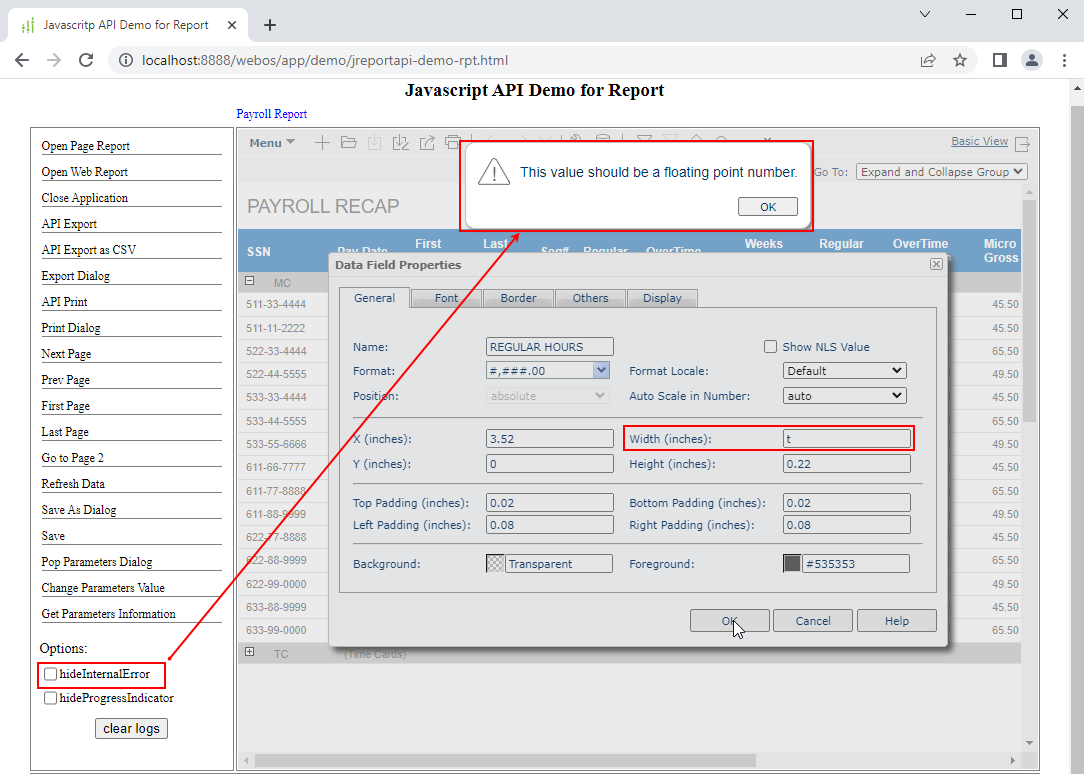
});- Show or hide internal errors using hideInternalError.
    thi$.onCkbHideInternalErrorChange = function (e) {
        server.jrd_prefer.common.hideInternalError = e.checked
    };
When hideInternalError is not selected:
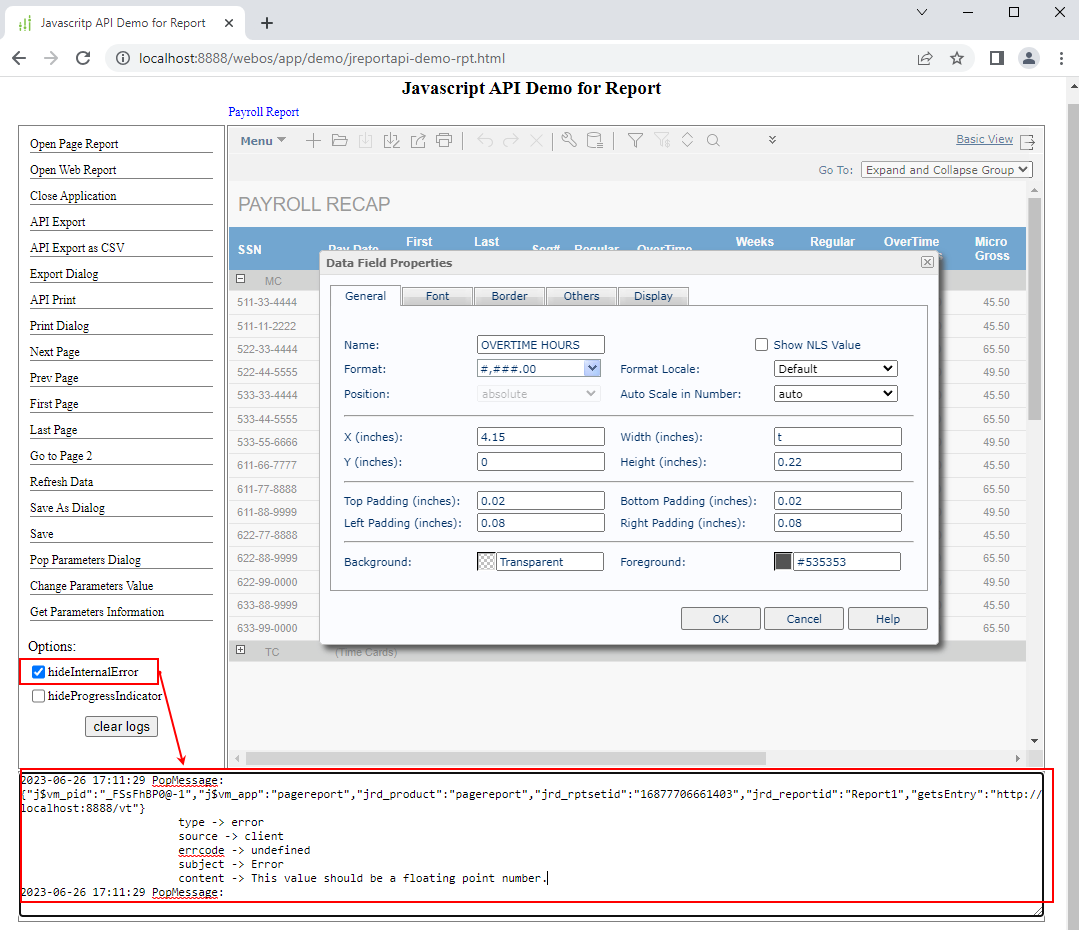
When hideInternalError is selected:
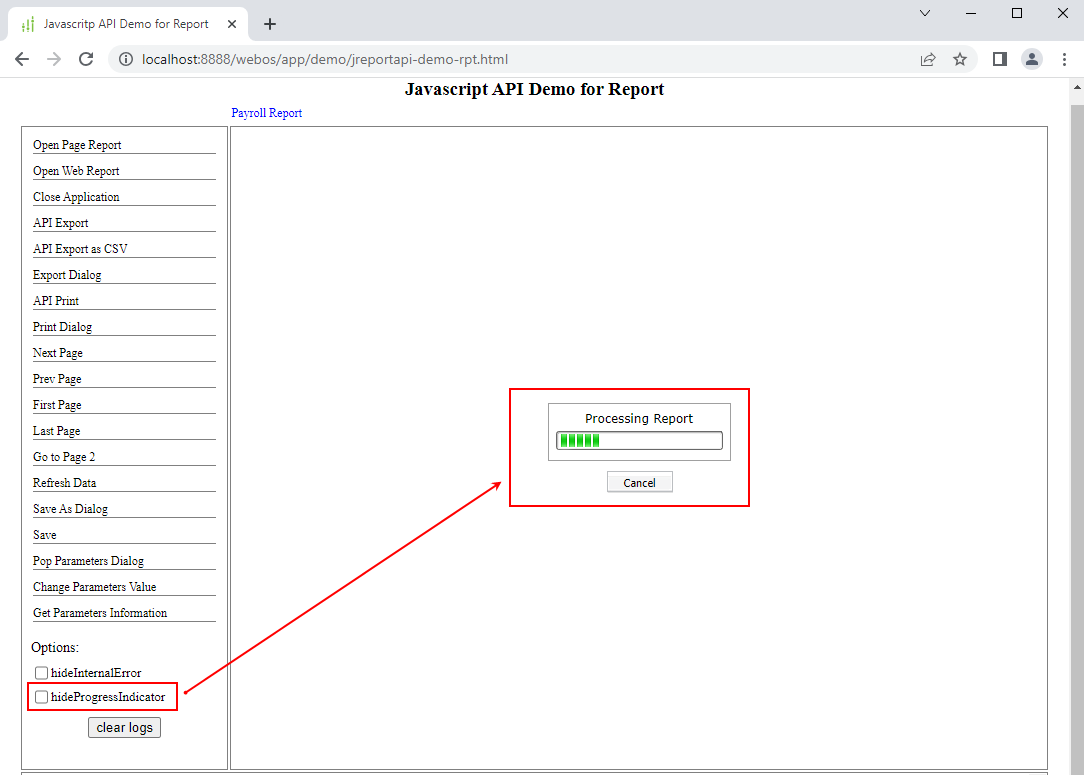
- Show or hide the status or loading indicator using hideProgressIndicator when running or refreshing reports.
- Publish running report messages to user applications
- Publish exporting report messages to user applications