Format Bubble Gauge Dialog Box Properties
You can use the Format Bubble Gauge dialog box to format a bubble gauge chart. This topic describes the properties in the dialog box.
This topic contains the following sections:
You see these elements on all the tabs:
OK
Select to apply any changes you made here and close the dialog box.
Cancel
Select to close the dialog box without saving any changes.
Help
Select to view information about the dialog box.
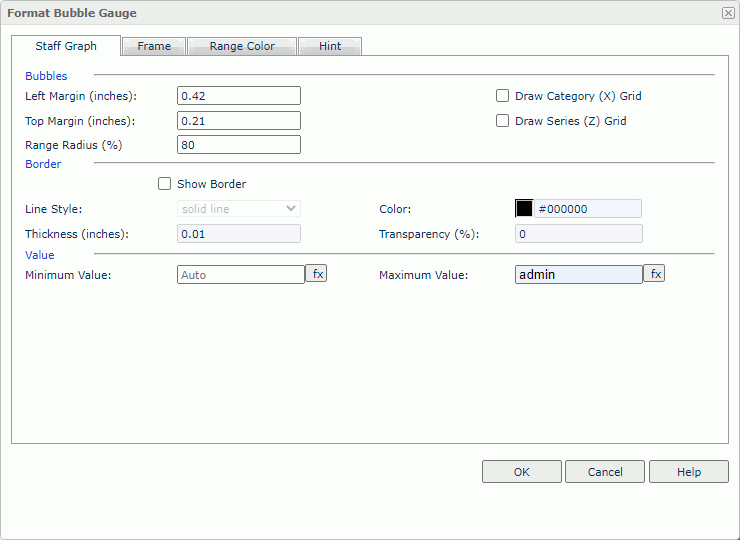
Staff Graph Tab Properties
Specify the properties for the bubbles in the bubble gauge.

Bubbles
Specify the properties of the bubbles.
- Left Margin
Specify the gap between the left labels and left bubbles, in inches. - Top Margin
Specify the gap between the top labels and top bubbles, in inches. - Range Radius
Specify the relative size of a bubble in a percentage of total bubble size. - Draw Category (X) Grid
Select to draw the category grid. - Draw Series (Z) Grid
Select to draw the series grid.
Border
Specify the properties for the border of the bubbles.
- Show Border
Select to show the border and enable the border properties.- Line Style
Select the line style of the border. - Color
Specify the color of the border. - Thickness
Specify the thickness of the border. - Transparency
Specify the transparency for the border color.
- Line Style
Value
Specify the minimum and maximum values for the color range. Server equally divides the values into three ranges, and automatically fills each range with the color you specify on the Range Color tab. Applied only when you do not specify ranges for the values on the Range Color tab.
- Minimum Value
Specify the minimum value to display in the chart. - Maximum Value
Specify the maximum value to display in the chart.
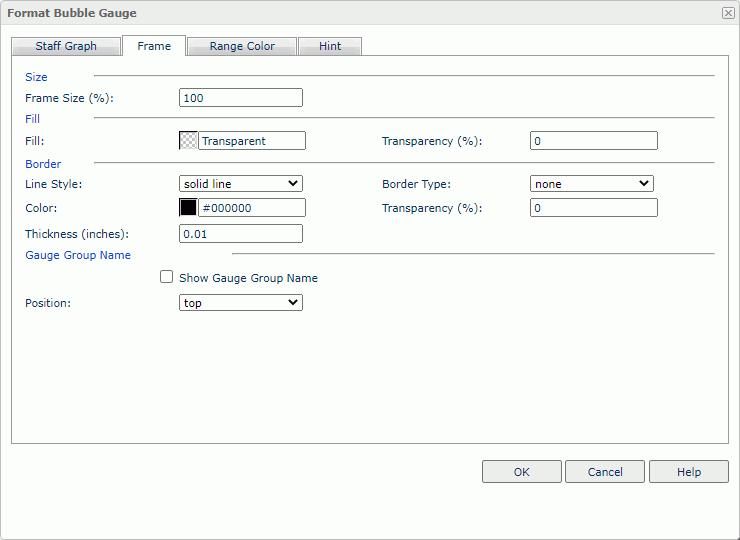
Frame Tab Properties
Specify the properties for the frame of the bubble gauge chart.

Size
Specify the size properties of the frame.
- Frame Size
Specify the size of the frame.
Fill
Specify the color and transparency of the frame.
- Fill
Specify the color to fill the frame. - Transparency
Specify the transparency of the color to fill the frame.
Border
Specify the properties for the border of the frame.
- Line Style
Select the line style of the border. - Border Type
Select the type of the border. - Color
Specify the color of the border. To change the color, select the color indicator to access the Select Color dialog box, and then specify a new color. You can also type a hexadecimal RGB value to specify a color, for example, #9933ff. - Transparency
Specify the transparency for the color of the border. - Thickness
Specify the thickness of the border, in inches.
Gauge Group Name
Specify the properties for the gauge group name.
- Show Gauge Group Name
Select to display names for the bubbles in the bubble gauge which are values of the field on its category axis. If the bubble gauge contains no category field, the group name shows Report by default.- Position
Select the position of the names relative to the bubbles. If you select customized, the X and Y settings on the General tab of the Format Gauge Label dialog box will take effect.
- Position
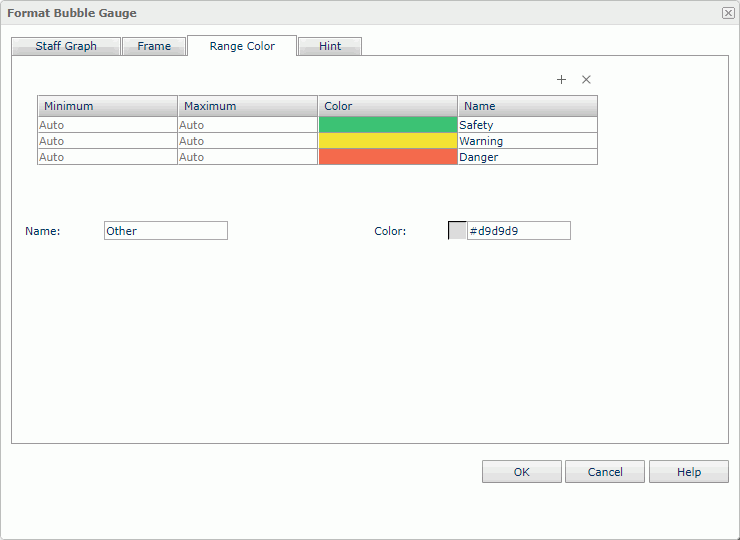
Range Color Tab Properties
Specify different colors to fill the bubbles in the bubble gauge in different ranges.

 Add button
Select to add a new color range.
 Remove button
Select to remove the selected color range.
Range table
-
Minimum
Specify the minimum value of a range. -
Maximum
Specify the maximum value of a range. -
Color
Select the color cell to open the Select Color dialog box, and specify a new color. -
Name
Specify the name of a range.
Others
Specify the properties for values that do not fall into any of the ranges you define in the range table.
- Name
Specify the name for the values. - Color
Specify the color for the values. To change the color, select the color indicator to access the Select Color dialog box, and then specify a new color. You can also type a hexadecimal RGB value to specify a color, for example, #9933ff.
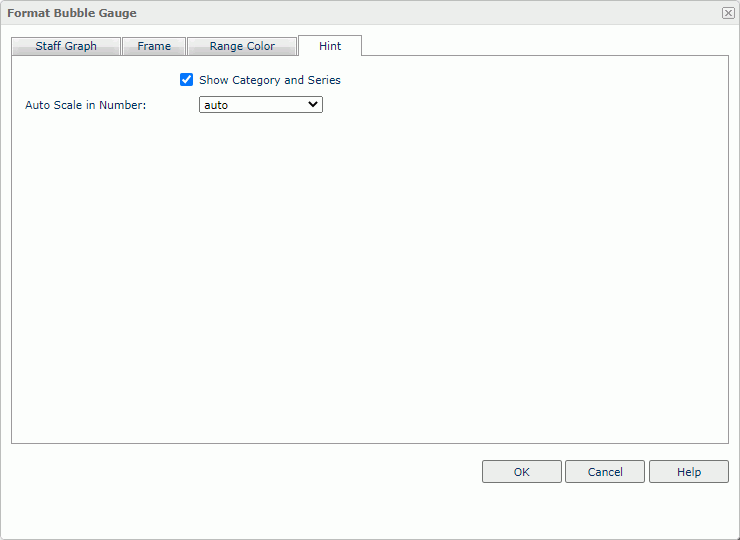
Hint Tab Properties
Specify the properties of the data marker hint.

Show Category and Series
Select to include the category and series values in the data marker hint.Auto Scale in Number
Select true if you want to automatically scale the values that are of the Number data type when the values fall into the two ranges:- When 1000 <= value < 10^15, Report uses the following quantity unit symbols of the International System of Units to scale the values: K (10^3), M (10^6), G (10^9), and T (10^12).
- When 0 < value < 0.001 or value >= 10^15, Report uses scientific notation to scale the values.
The default value auto means that the setting follows that of the chart platform.
 Previous Topic
 Back to top