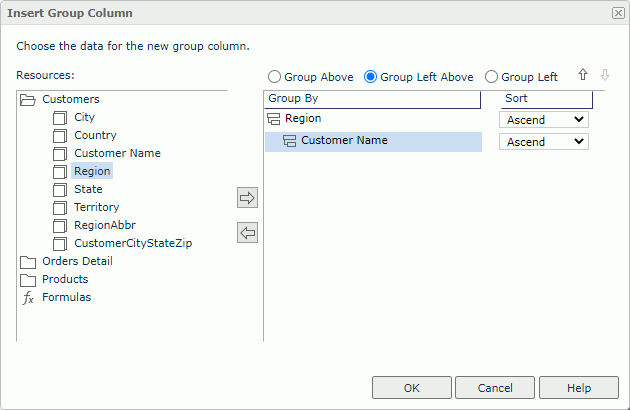
Insert Group Column Dialog Box Properties
You can use the Insert Group Column dialog box to insert new group columns into a table. This topic describes the properties in the dialog box.

Resources
Select a group object in the current business view.
 Add button
Select to add the selected group object as group-by field to group data in the table.
 Remove button
Select to remove the selected group-by field.
Group By
Server lists the fields you selected to group data in the table.
Sort
Specify how you want to sort the groups at the specific group level.
- Ascend
Select to sort a group in ascending order. - Descend
Select to sort a group in descending order. - No Sort
Select if you want a group to use the same order as in the catalog.
Group Above
Select to place the selected group-by field in its own row above the detail information.
Group Left Above
Select to place the selected group-by field in its own row and column above and left of the detail information.
Group Left
Select to place the selected group-by field in its own column left of the detail information.
 Move Up button
Select to move the selected item higher in the list.
 Move Down button
Select to move the selected item lower in the list.
OK
Select to insert the group columns in the table.
Cancel
Select to close the dialog box without the insertion.
Help
Select to view information about the dialog box.
 Previous Topic
 Back to top