 Previous Topic
Mapping Table Dialog Box Properties
This topic describes how you can use the Mapping Table dialog box to define the mapping relationship between fields in the primary report and linked report.
When you select Mapping Table in the Insert Link dialog box or Edit Link dialog box, the Mapping Table dialog box looks like this. You can define the mapping relationship based on which Server passes the on-screen filters in the primary report to the linked report.
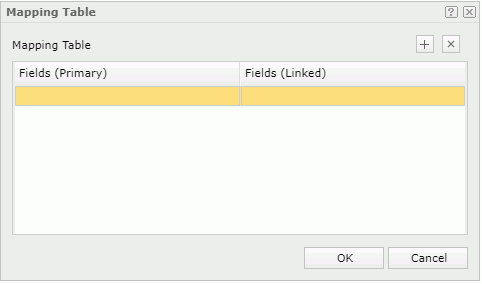
Fields (Primary)
Specify the fields in the primary report to set up the mapping relationship.
The drop-down list contains all fields in the business view used by the trigger component in the primary report. However, if the trigger object is in a crosstab, Server only lists the field that is related to the trigger object. Select a field that binds with an on-screen filter to define the mapping relationship.
Fields (Linked)
Specify the fields in the linked report to set up the mapping relationship.
The drop-down list contains all the fields in the business view used by the selected component in the linked report, which are of the same data type as the specified primary report field. Select a field whose values are the same as those of the specified primary report field. Then, when you trigger the link, the corresponding on-screen filter in the primary report will apply to the selected linked report field.
 Add button
Select to add a mapping line.
 Remove button
Select to remove the selected mapping line.
OK
Select to apply any changes you made here and close the dialog box.
Cancel
Select to close the dialog box without saving any changes.
 Help button
Select to view information about the dialog box.
 Close button
Select to close the dialog box without saving any changes.
 Back to top
When you select a linked data component in the Components box and then select the Mapping Table button  in the Field Conditions section in the Insert Link dialog box or Edit Link dialog box, the Mapping Table dialog box looks like this. You can define the mapping relationship between Current Field in the primary report and Corresponding Field in the linked report.
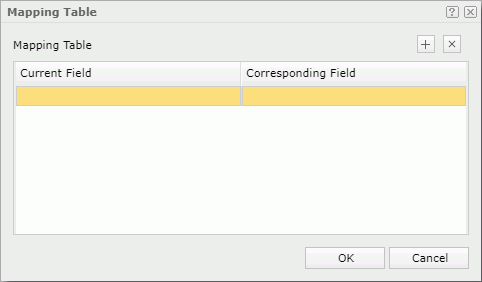
Current Field
Specify the fields in the primary report to set up the mapping relationship.
The drop-down list contains all the fields in the business view used by the data component that contains the trigger object in the primary report. However, if the trigger object is in a crosstab, Server only lists the field that is related to the trigger object. Select a field to define the mapping relationship.
Corresponding Field
Specify the fields in the linked report to map to the current field you specified.
The drop-down list contains all the fields in the business view used by the linked data component in the linked report, which are of the same data type as the current field. Select a field whose values are the same as those of the current field.
Add button
Select to add a mapping line.
Remove button
Select to remove the selected mapping line.
OK
Select to apply any changes you made here and close the dialog box.
Cancel
Select to close the dialog box without saving any changes.
Help button
Select to view information about the dialog box.
Close button
Select to close the dialog box without saving any changes.