 Previous Topic
Formatting Pie/Donut Chart
This topic describes how you can format the pies/donuts of a pie/donut chart, and the KPI value labels when the chart shows KPI values.
This topic contains the following sections:
Formatting Pies/Donuts
- Right-click any pie/donut in the pie/donut chart and select Format Pie/Format Donut on the shortcut menu, or double-click any section in a pie/donut in the chart. Designer displays the Format Pie dialog box or Format Donut dialog box.

- In the General tab, set the general properties of the pies/donuts.
- In the Options box, specify the distance between every two adjacent pies/donuts in the Gap Amount text box and the distance between the sections in each pie/donut and the pie/donut center in the Explode Amount text box. For a donut chart, you can also specify the radius percentage of the donut hole to the total donut circle by setting Donut Hole.
- When you do not set the chart property Swap Groups to "true" in the Report Inspector, Designer enables the options in the KPI Value box. You can select Show KPI Value to display KPI value for each pie/donut. By default, Designer uses the total value of each pie/donut as the KPI value; if you want to customize the value, clear Auto and type a value in the text box, or select
 and select a formula or summary from the drop-down list to use its value as the KPI value. Designer calculates KPI values based on series if the chart contains series field; otherwise based on the total value. From the Position drop-down list, select the position of the KPI value relative to the pies/donuts; if you select customized, you can specify the position by dragging any KPI value in the pie/donut chart. When you specify to show KPI value in the chart, you can further format the KPI value labels according to your requirements.
 - In the Angle box, specify the rotation angle of the pies/donuts around the X and Y axes.
- In the Fill tab, specify the fill type and the color pattern to fill the pies/donuts.
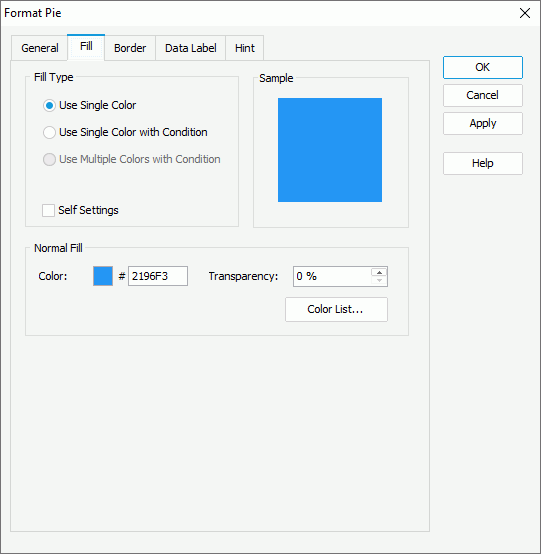
- When you select the Use Single Color fill type,
- Make your choice for the Self Settings option. When Self Settings is cleared (the default behavior), Designer synchronizes the color pattern that you specify here with the Pattern List property of the chart in the Report Inspector, which data markers of other subtypes can also apply if the chart is a combo chart. When you select Self Settings, it indicates that the color pattern is private to the current data markers themselves (the pies/donuts in this case), which Designer remembers and applies to data markers of the new type automatically if you change the type of the chart later.
- Specify the color and transparency to fill the pie/donut sections in the current data series, that is, the sections in the same data series as the one you have selected on to open the Format Pie or Format Donut dialog box (to change the color, select the color indicator and select a color from the color palette, or type the hexadecimal RGB value of a color in the text box).
- You can also select Color List to specify the color pattern for pie/donut sections in each data series respectively in the Color List dialog box.
- When you select the Use Single Color with Condition fill type, specify the conditions and the color pattern for each condition respectively. See Adding Conditional Color Fills to Charts.
- When you select the Use Single Color fill type,
- In the Border tab, select Show Border if you want to display border for the pie/donut sections, then specify the border properties.
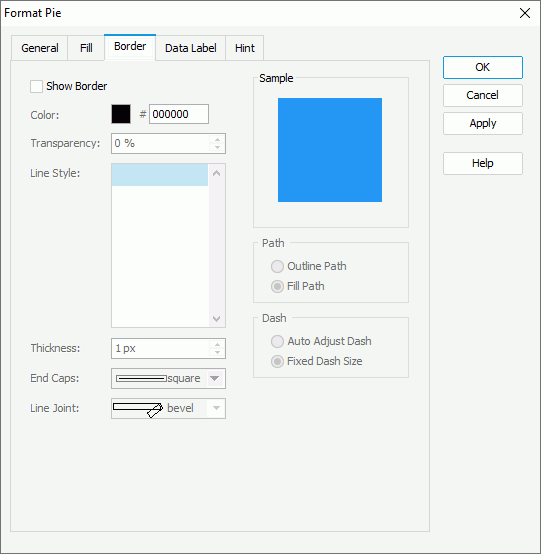
- Specify the color, transparency, line style, thickness, ending style, and line joint mode of the border.
- In the Path box, specify the fill pattern of the border: Outline Path or Fill Path.
- In the Dash box, select to automatically adjust the dash size or use fixed dash size if you select a dash line style for the border.
- In the Data Label tab, specify properties of the static data labels in the pie/donut chart.
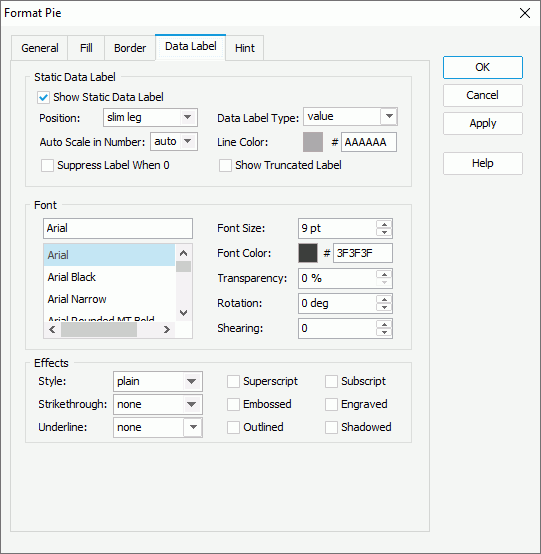
- In the Static Data Label box, select Show Static Data Label if you want to show static data labels for the pie/donut sections, then specify the position of the data labels relative to the pie/donut sections, the type of the data labels, whether to scale big and small numbers in the data labels, the color of the line pointing to the static data labels, and whether to hide the data label when its value is 0. Select Show Truncated Label if you want to truncate the static data labels that go beyond the boundaries of the chart paper instead of them being hidden altogether (the default behavior). Designer then displays an ellipsis (…) from the right side of the label, along with part of the name instead of the entire name. The truncated labels are also affected if you select the Position option as "best fit", where the label is cut off from the left or the right depending on the position of the label.
- In the Font and Effects box, specify the font format and special effects of the data labels, such as the font face, font size, font color, and the font style of the data labels.
- In the Hint tab, specify properties of the chart hint. A hint displays the value a section in the pie/donut chart represents when you point to the section in Designer view mode, in HTML output, or at runtime.
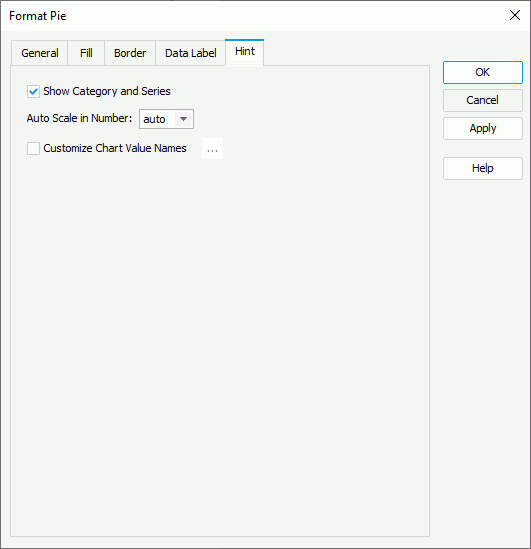
- Clear Show Category and Series if you do not want to include the category and series values in the hint.
- Specify whether to scale big and small numbers in the hint.
- Select Customize Chart Value Name to use customized names for the fields on the value axis in the hint and select the ellipsis
 to customize the names as you want.
 You should not edit the Show Tips property of the Chart Paper object in the Report Inspector which is "true" by default, if you want to display the hint.
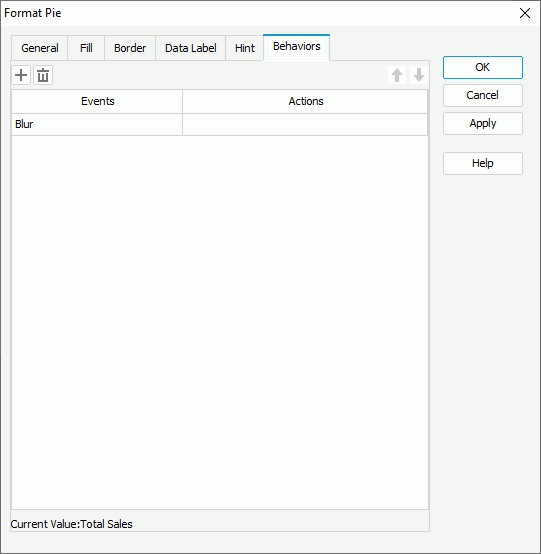
 - For a pie/donut chart in a library component, you can specify web behaviors for it in the Behaviors tab, to enable users to trigger different web actions when they perform specific operations such as Click and Mouse Over on the pies/donuts at runtime.
- Select OK to accept the changes and close the dialog box.
 Back to top
Formatting KPI Value Labels
When a pie/donut chart displays KPI values, you can customize the KPI value labels, for example, edit the size and border of the labels, change the label font size, font color, and so on.
To format the KPI value labels of a pie/donut chart
- Right-click the KPI value for any pie/donut and select Format KPI Label on the shortcut menu, or double-click the KPI value for any pie/donut. Designer displays the Format KPI Label dialog box.
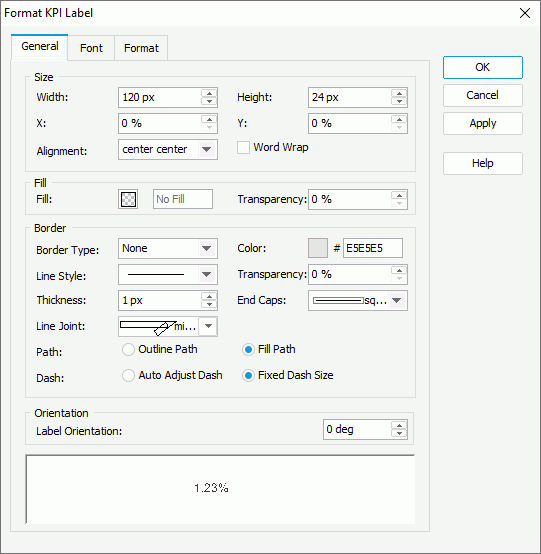
- In the General tab, specify the general properties of the labels.
- In the Size box, set the width and height of the labels, the horizontal and vertical coordinate of the top left corner of the labels relative to their parent container, the alignment of the text in the labels, and whether to wrap the label text.
- In the Fill box, specify the color or effects and the transparency to fill the labels.
- In the Border box, specify properties for the border of the labels, including the type, color, line style, transparency, thickness, ending style, line joint mode, fill pattern, and dash size.
- In the Orientation box, specify the angle to rotate the labels.
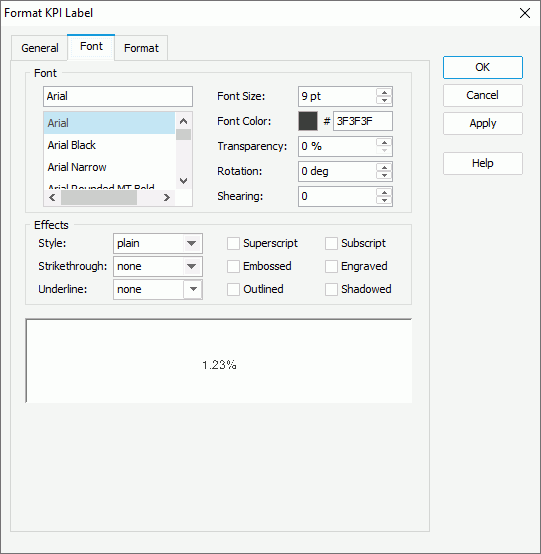
- In the Font tab, specify the font properties of the labels, including the font face, size, color, transparency, rotation angle, and shearing angle. You can also apply some special effects to the labels, such as italicizing the labels and adding a horizontal line under the labels.
- In the Format tab, specify the data format of the labels.

- Select a category from the Category box, then select a format from the Format box and select Add to add it to the Stack box. Select here for more information about each format.
- When the formats Designer provides in the Format box cannot meet your requirement, you can define the format in the Properties text box and add it as the format of the selected category. You can add more than one format, but for each category, only one format is allowed.
- If you do not need a format anymore, select it in the Stack box and select Remove to clear it.
- Set the Auto Scale in Number option to specify whether to automatically scale the big and small Number values.
- Select OK to accept the changes and close the dialog box.