Using Tables/Views/Synonyms
Tables, views, and synonyms (only the Oracle database supports synonyms) are mapped objects of the tables, views, and synonyms in the raw database that a connection refers to. Mapped objects have mapped names that can be different from their names in the raw database. A catalog stores information about the real tables/views/synonyms mapped, such as the name, qualifier, and owner. This topic introduces how you can add tables, views, and synonyms into a catalog via the JDBC connections you have set up, and work with these objects in the catalog.
Since tables/views/synonyms are only mapped objects, they can be mapped and then remapped. That is, the information of the real tables/views/synonyms stored in a catalog is changeable. This is useful when you are offline from your database. You can still see the table/view/synonym structure and generate reports. However, you cannot view the report since the catalog only stores a metadata layer, not the database data. In addition, when you change a JDBC connection, for example, from an MySQL database to an Oracle database, you only need to remap all the tables/views/synonyms in the catalog as opposed to creating a new catalog.
This topic contains the following sections:
- Adding Tables/Views/Synonyms to a Catalog
- Refreshing Tables/Views/Synonyms
- Organizing Tables/Views/Synonyms into Folders
- Removing and Adding Columns to Tables/Views/Synonyms
- Previewing the Column Data of Tables/Views/Synonyms
Adding Tables/Views/Synonyms to a Catalog
- In the Catalog Manager resource tree, do one of the following:
- Right-click the JDBC connection and select Add Tables/Views/Synonyms from the shortcut menu.
- Right-click the Tables/Views/Synonyms node of the JDBC connection and select Add Tables/Views/Synonyms from the shortcut menu.
- Right-click an existing table/view/synonym in the JDBC connection if there is and select Add Tables/Views/Synonyms from the shortcut menu.
- Right-click any folder in the Tables/Views/Synonyms node of the JDBC connection if you have already created some and select Add Tables/Views/Synonyms from the shortcut menu.
- Select the Tables/Views/Synonyms node of the JDBC connection, or any existing table/view/synonym or folder in the connection and select Add Tables/Views/Synonyms on the Catalog Manager toolbar.
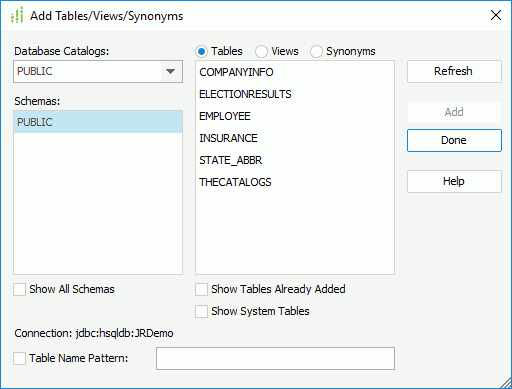
Designer displays the Add Tables/Views/Synonyms dialog box.

- From the Database Catalogs drop-down list, select the required catalog, then specify a schema in the selected catalog from the Schemas box.
- Select Tables/Views/Synonyms.
- Select Refresh. Designer then displays the tables/views/synonyms contained in the selected schema in the tables/views/synonyms box.
- Select Show System Tables/Show System Views/Show System Synonyms if you want to have the system tables/views/synonyms available in the tables/views/synonyms box.
- Select Show Tables Already Added/Show Views Already Added/Show Synonyms Already Added to make the tables/views/synonyms that you have already added to the connection available in the tables/views/synonyms box if you want to add them again.
- Choose the required tables in the tables/views/synonyms box, and then select Add.
- Repeat steps 2 to 4 to add tables from other catalogs and schemas.
- To add certain tables by name or by patterns in their name, select Table Name Pattern/View Name Pattern/Synonym Name Pattern. Designer then displays the wildcard "%" in the text box. For example, if you want to add tables/views/synonyms beginning with "AL", you can type AL% (case sensitive) in the text box, and select Refresh. Designer then displays all the tables/views/synonyms beginning with "AL" in the selected schema in the tables/views/synonyms box. Select the tables/views/synonyms you want and select Add to add them to the catalog.
- After adding the tables/views/synonyms you need, select Done to close the dialog box. You can create pre-joins between the tables/views/synonyms.
You can then create queries and business views based on the tables, views, and synonyms, and a report is developed from a query (or something else which is functionally similar) or from a business view.
![]()
- If you have selected schemas in the Schema tab of the Get JDBC Connection Information dialog box when setting up the connection, when you add tables/views/synonyms, by default, Designer only lists the selected schemas in the Schemas box of the Add Tables/Views/Synonyms dialog box. You can select the Show All Schemas option to show all the schemas.
- When adding tables/views/synonyms, if you select Show Tables Already Added/Show Views Already Added/Show Synonyms Already Added in the Add Tables/Views/Synonyms dialog box, when you select Add to add a table/view/synonym that you have already added to the catalog once, Designer displays a dialog box, prompting you to give the new table/view/synonym a different name.
Refreshing Tables/Views/Synonyms
The tables/views/synonyms in your catalog are a temporary deposit to improve the performance when you design and test your report. Your database keeps changing over the time. However, these cannot be reflected automatically in your catalog. To synchronize your tables/views/synonyms in the catalog and database, you can choose to refresh the tables/views/synonyms information using the Refresh command on their shortcut menu. Then when Designer finishes the refreshing job, it displays a dialog box, summarizing the changes and operations that have been taken.
Organizing Tables/Views/Synonyms into Folders
You can organize the tables/views/synonyms that you have added to a catalog via a JDBC connection, by arranging them in different folders.
To add a folder
- Do one of the following:
- Right-click the Tables, Views or Synonyms node and select New Folder from the shortcut menu.
- Right-click any existing folder and select New Folder from the shortcut menu.
- Selecting any existing table, view, synonym, or existing folder and select New Folder on the Catalog Manager toolbar.
- Designer adds a new folder to the Tables/Views/Synonyms node, or in the selected folder. Type a name for the folder in the editing area, and then select outside to confirm the change.
To move tables/views/synonyms to a folder
- Right-click the table/view/synonym you want to move and select Move To from the shortcut menu.
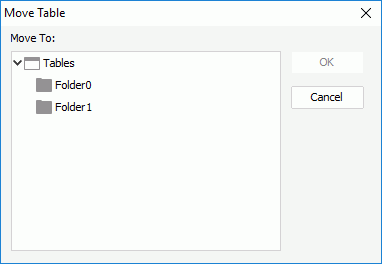
- In the Move Table/Move View/Move Synonym dialog box, select the folder to which you want to place the table/view/synonym, then select OK.

Removing and Adding Columns to Tables/Views/Synonyms
By default, when you add a table/view/synonym, you add all the columns present in the table/view/synonym. However, Designer gives you the flexibility to remove columns in a table/view/synonym, leaving only the columns useful to your reports. Additionally, your database keeps changing over the time. You can add the columns to the table/view/synonym after you delete them or the database has been updated.
To remove a column from a table/view/synonym
- Select the column you want to remove.
- Right-click the column and select Delete from the shortcut menu. This does not remove the column from the database, only from what is visible in Designer.
To add columns to a table/view/synonym
- Right-click the table/view/synonym to which you want to insert columns, then select Add Columns from the shortcut menu.
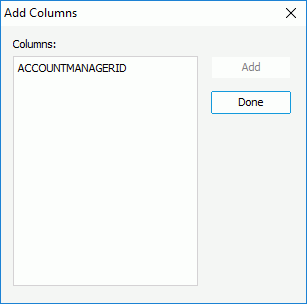
- In the Add Columns dialog box, select the columns you want to add from the Columns box and select Add. There are no available columns in the Columns box if you have not deleted any in the table/view/synonym before, or no updates have been made to the database. That is to say, you cannot add columns that do not belong to the table/view/synonym.

- Select Done to add the columns to the table/view/synonym.
![]() If you want to add all the columns in a table/view/synonym at the same time, you can also choose to refresh the table/view/synonym, which synchronizes the table/view/synonym in the catalog with the one in your database.
If you want to add all the columns in a table/view/synonym at the same time, you can also choose to refresh the table/view/synonym, which synchronizes the table/view/synonym in the catalog with the one in your database.
Previewing the Column Data of Tables/Views/Synonyms
In the Catalog Manager, you can preview the data for a database column, which enables you to have a general idea about the field content, field type, and other useful information related to this field.
To preview data of a column
- Right-click the column, then on the shortcut menu, select Browse Data.
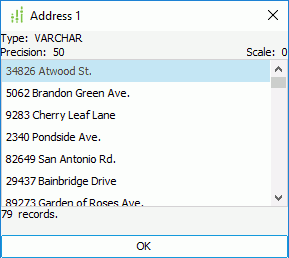
- Designer displays the data of this column in a list in a dialog box, which also includes other information including the field type, precision, scale, and number of records.

 Previous Topic
 Back to top