Insert Image Dialog Box Properties
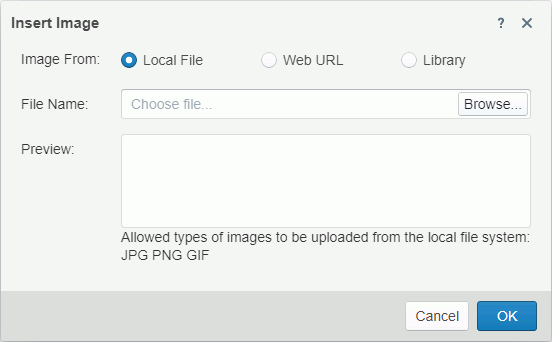
This topic describes how you can use the Insert Image dialog box to select the image you want to use.
Server displays the dialog box when you drag Image in the Basic category from the Components panel to the template edit area.

Image From
Specify the source of the image file.
- Local File
Select to use an image from the local file system.- File Name
Specify the path and name of the image file. You can select Browse to locate the image file.
- File Name
- Web URL
Select to use an image via URL.- File URL
Specify the URL of the image file.
 If your Server is in an intranet which requires a proxy, to access the image via URL, you need to add the parameters
 -Dhttp.proxyHost=XXX -Dhttp.proxyPort=XXto the server startup file JRServer.bat in<install_root>\bin. - File URL
- Library
Select to use an existing image.- My Pictures
The My Pictures folder is a virtual location where Server stores the images that you have once inserted into reports. Select the one you want to use.
- My Pictures
Preview
Server displays a preview of the selected image.
Cancel
Select to close the dialog box without inserting an image.
OK
Select to insert the image into the report and close the dialog box.
 Help button
Select to view information about the dialog box.
 Close button
Select to close the dialog box without inserting an image.
 Previous Topic
 Back to top