Exporting/Printing a Web Report
When you finish editing a web report, you may want to export it to other formats or print it. This topic describes how you can export or print a web report.
Exporting a Web Report
You can export a report as a result version or as a local file in these formats: HTML, PDF, Text, Excel, RTF, XML, and PostScript.
- Select Menu > File > Export, or select the Export button
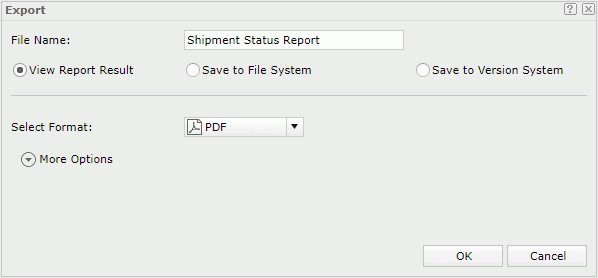
 on the toolbar. Server displays the Export dialog box.

- In the File Name field, type the name of the exported report file.
- Specify the destination you want to export the report:
- View Report Result: Server opens the report directly in the web browser if a plug-in of the web browser supports the format; otherwise it prompts you to save the report file.
- Save to File System: Server prompts you to save the report file to a specified folder. You need to provide a name for the report file in the File Name field.
- Save to Version System: Server saves the report as a result version in the versioning system.
- From the Select Format drop-down list, select the format in which you want to export the report.
- To specify the additional settings of the selected format, select More Options.
- From the Style Group drop-down list, select the style group you want to apply to the exported report.
- Set the other options for the selected format.
- Select OK to apply the changes.
Tip: Before exporting a report, you can customize the page properties for each exported report according to your requirement. For more information, see Setting up the report page.
Printing a Web Report
- Select Menu > File > Print, or select the Print button
 on the toolbar. Server displays the Print dialog box.

- From the Printer drop-down list, select the printer using which you want to print the report. Server lists all the printers the web browser can access here. If you want to download the report to a PDF or HTML file and then use your local printer to print the file, select Save as PDF or Save as HTML.
- If you have selected a printer, you can select Properties to specify the printing properties in the Printer Properties dialog box. Then select the numbers of copies you want to print.
- Specify the page orientation and paper type for the printed report file.
- You can select the More Settings link to set more page properties such as paper size and margins in the Page Setup dialog box.
- Select OK to start printing. If you selected Save as PDF or Save as HTML in the Printer drop-down list, Server opens the report file in an associated program with which you can print the report to a printer.
 Previous Topic
 Back to top