 Previous Topic
Using Advanced Web Controls
Advanced web controls refer to Expand/Collapse Group, Parameter Control, Parameter Form Control, Filter Control, and Navigation Control. They are defined with specific web actions and are used for specific purposes. This topic introduces how you can use each of the advanced web controls to serve different reporting requirements.
This topic contains the following sections:
- Expanding/Collapsing the Groups in Banded Objects
- Using Parameter Controls to Specify Parameters to Reports
- Using Parameter Form Controls to Run Reports
- Using Filter Controls to Filter Report Data
- Using Navigation Controls to Undo/Redo Value Selection in Filter Controls
See Component Placement in Different Report Type about the report areas where you can insert advanced web controls.
Expanding/Collapsing the Groups in Banded Objects
You can use the Expand/Collapse Group web control in the group header panels of banded objects in page reports, so that users in Page Report Studio can use the web control to expand/collapse details of the groups.
 The Expand/Collapse Group feature works only in continuous page mode.
To insert to an Expand/Collapse Group web control for a banded object group
- Make sure to clear Page Layout in the View ribbon.
- Select the group header panel of the group level in the banded object.
- Navigate to Insert > Web Control > Expand/Collapse Group.
- Select in the group header panel. Designer inserts the web control there.
After publishing the report to Server and running it in Page Report Studio, users are able to use the web control which appears like a plus or minus sign to expand or collapse a group (that is, to show or hide details of that group). Furthermore, you can use two properties of a group panel to set the expanding/collapsing state of all groups in the corresponding group level: use Expand Detail Data to control whether to expand details of the group, and Shrink Footer to control whether to hide the group footer panel when collapsing the details.
 Back to top
Using Parameter Controls to Specify Parameters to Reports
A parameter control is a web control that is bound with a parameter the current report uses. By specifying values to the parameter in a parameter control at runtime, users can run the report with the specified values.
Parameter controls do not support cascading parameters. If you want to do this, use parameter form controls instead.
To insert a parameter control into a report
- Position the mouse pointer at the allowed report location where you want to insert the parameter control.
- Do one of the following:
- From the Components panel, drag the Parameter Control icon
 in the Web Controls category to the destination.
 - Navigate to Insert > Web Controls> Parameter Control.
- Navigate to Home > Insert > Web Controls> Parameter Control.
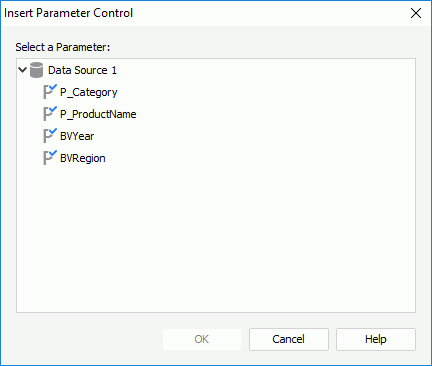
Designer displays the Insert Parameter Control dialog box.
- From the Components panel, drag the Parameter Control icon
- Specify the parameter you want to add to the parameter control from the Select a Parameter box, which lists all the parameters except cascading parameters used in the current report. For a report using business views, you can also use a local parameter.
- Select OK to insert the parameter control.
Using Parameter Form Controls to Run Reports
A parameter form control is a web control that is bound with the parameters the current report or other reports use. By specifying values to the parameters in a parameter form control at runtime, users can run the reports with the specified parameter values.
To insert a parameter form control into a report
- Position the mouse pointer at the allowed report location where you want to insert the parameter form control.
- Do one of the following:
- From the Components panel, drag the Parameter Form Control icon
 in the Web Controls category to the destination.
 - Navigate to Insert > Web Controls > Parameter Form Control.
- Navigate to Home > Insert > Web Controls > Parameter Form Control.
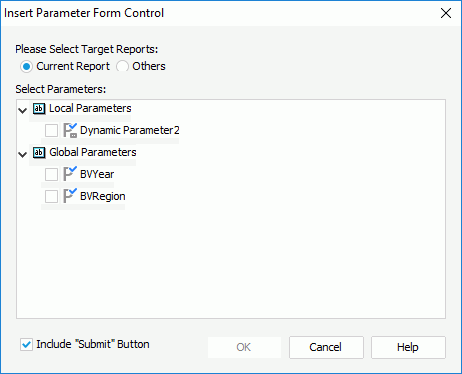
Designer displays the Insert Parameter Form Control dialog box.
- From the Components panel, drag the Parameter Form Control icon
- Specify the target reports to run using the parameter form control.
- To run the current report, select Current Report, then specify the parameters used to run the report from the Select Parameters box. For a report using business views, you can also use local parameters to run it.
- To run other reports, select Others, then select the reports you want to run. If all the selected reports contain no parameters, you cannot finish the dialog box.
- Specify whether to include the Submit button in the parameter form control. If you include it, users can use it to submit the parameter values they specify in the parameter form control at runtime; if you do not include it, once users change the value of a parameter in the parameter form control, Server applies the new value automatically.
- Select OK to insert the parameter form control.
If you save a report containing a parameter form control to another directory, or publish it to a local directory or to Server, Designer does not save or publish the reports that you select to run using the parameter form control along with the report. Therefore, to ensure that users can use the parameter form control correctly at runtime, you need to publish all the reports to the same folder on Server.
Using Filter Controls to Filter Report Data
You can use filter controls to filter one or more data components in a report based on the fields in the data resources the data components use. After inserting filter controls, you can also insert a navigation control for undoing/redoing the value selection in the filter controls. Report refers to the filter created via filter control as on-screen filter.
Filter Control Types
Report supports four types of filter controls:
- Text List
A text list filter control enables you to pick one or more random values from a list and is used with categorical or nominal variables. You can choose one or more values from anywhere in the list and there is no mean or median value calculation. - Drop-down List
A drop-down list filter control functions basically the same as Text List. It differs from the Text List type by listing values by means of a drop-down list so that it takes less space in a report. In a drop-down list filter control, Report provides checkboxes ahead of the values for easy selection of multiple values. You can use this filter control type in web reports and library components. - Single Value Slider
A single value slider filter control enables you to select one single value from a list and is suitable for displaying a few values like quarters. You can use this filter control type in library components only. - Range Slider
A range slider filter control enables you to pick multiple sequential values from a list and is used for interval variables such as dates, times, quantity, and currency variables where the slider represents the scale from lowest to highest values and the middle represents the median value. You can use this filter control type in library components only.
Filtering Scenarios and Filter Logic
Filtering based on one field is a common usage. Bind a field to a filter control, and then based on the field to filter the data components created from the same data resource as the field. Another special usage is to filter data components created using different data resources. In this case, you need to choose a common field all the data resources contain and select the common field from all the data resources to bind them to the filter control. The name of the fields do not need to be the same but the data returned needs to be similar.
After you select values in one or more filter controls in a report, Report Engine applies a filter condition based on the selected values of the specified fields to the designated data components in the report, with each field affecting only the data components based on the same data resource as the field. The value selection logic is:
- When you select one value of one field, the filter condition is "Field1=SelectedValue1", for example, "Country=USA". Report Engine applies the filter condition to the data components that use the same data resource as the field.
- When you select multiple values of multiple fields in one data resource, the filter condition uses the "AND" logic between the fields: "(Field1=SelectedValue1 or Field1=SelectedValue2) and (Field2=SelectedValue3 or Field2=SelectedValue4)...", for example, "(Country=USA or Country=China) and (Year=2017 or Year=2018)". Report Engine applies the filter condition to the data components that use the data resource.
- When you select multiple values of multiple fields in different data resources, the filter condition uses the "OR" logic between the fields: "(Field1=SelectedValue1 or Field1=SelectedValue2) or (Field2=SelectedValue3 or Field2=SelectedValue4)...", for example, "(Country=USA or Country=China) or (Year=2017 or Year=2018)". Report Engine applies the filter condition to all the data components that use these data resource.
Inserting a Filter Control in a Report
- Position the mouse pointer at the allowed report location where you want to insert the filter control.
- Do one of the following:
- From the Components panel, drag the Filter Control icon
 in the Web Controls category to the destination.
 - Navigate to Insert > Web Controls > Filter Control.
- Navigate to Home > Insert > Web Controls > Filter Control.
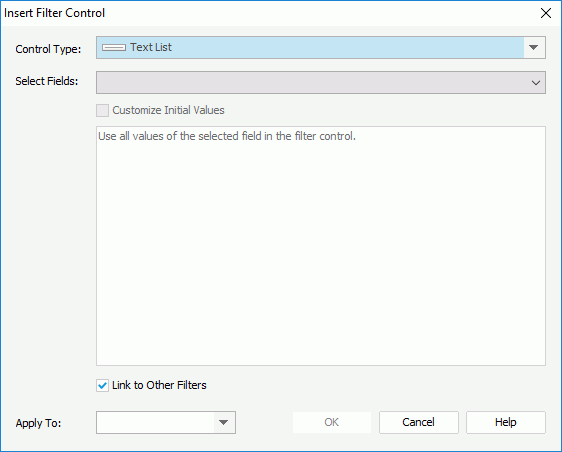
Designer displays the Insert Filter Control dialog box.
- From the Components panel, drag the Filter Control icon
- The Control Type drop-down list displays the filter control types that you can use in the current report. Select the type you need.
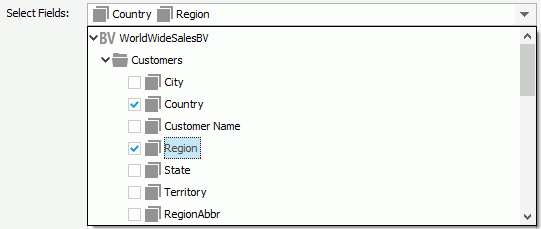
- From the Select Fields drop-down list, select the fields of the same data type to bind to the filter control, then select outside the drop-down list to close it.
You cannot bind fields of incomparable data types to a single filter control, such as Binary, Blob, Clob, Longvarchar, Longvarbinary, and Varbinary. For a text list filter control, after the filter control is created, Designer applies the name of the first displayed field you select in the field list as the title of the filter control.
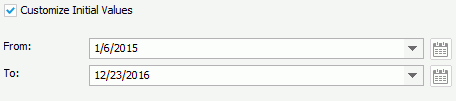
- By default, Designer uses all values of the selected fields in the filter control except for the drop-down list filter control which can display 300 values at most. If you want to customize the value list, select Customize Initial Values and customize the values as you want.
- To customize the values for a text list, drop-down list, or single value slider
Select Fetch Data to select values from the database in the Fetch Data dialog box. You can also type the values manually in the value text box. Designer supports general text editing operations such as Copy, Paste, Cut, Backspace, and Delete in the value text box. To add a value, type it in one row, then select Enter on the keyboard to start a new row. You need to make sure of the accuracy of the formats and values. If the selected fields are of the Date/Time type, you can also select the calendar to specify a date and time value from the calendar widget.
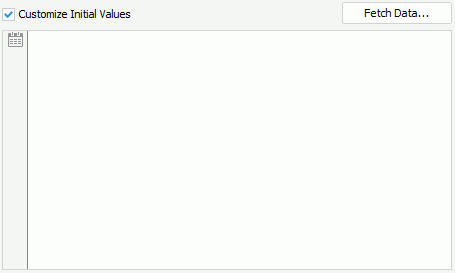
- To customize the values for a range slider
Select the start value of the slider from the From drop-down list and the end value from the To drop-down list. If the selected fields are of the Date/Time type, you can also select the calendar to specify a date and time value from the calendar widget.
- To customize the values for a text list, drop-down list, or single value slider
- By default, Designer links all filter controls that are applied to the same data components. Selecting a value in one filter control, for example, "USA", results in that all the other linked filter controls respond to gray the values that do not belong to or contain USA or that are not related to USA like "London". If you do not want the filter control to be affected by other filter controls, clear Link to Other Filters. For the case of one filter control using a business view and another using a query, if the business view contains the query definition, the two filter controls are also linked.
- If you are creating a slider and the fields you select to bind to the slider are of the Date/Time type, Designer displays the Special Function drop-down list. You can apply a special function to the fields.
- From the Apply To drop-down list, select to which data components to apply the filter. By default, Designer applies the filter to all the data components using the data resources that contain the selected fields. If you do not select the data components which are based on the same data resource as any selected fields, Designer does not use these fields in the filter and thus you cannot get their values in the filter control.
- Select OK to insert the filter control. At runtime, users can select one or more values from the text list or drop-down list filter control, a value from the single value slider, or a value range on the range slider to filter the specified data components. If the fields bound to the filter control have the same values, the values are distinctive in the filter control.
For the filter controls inserted into a report, you can further edit them if you want. To edit a filter control, right-click the filter control and select Edit Filter Control from the shortcut menu. In the Edit Filter Control dialog box, edit the filter control settings.
If you delete all the data components in a report that use the same data resource, Designer automatically removes the fields in the data resource that you have added to the filter controls in the report from the filter controls.
Using Navigation Controls to Undo/Redo Value Selection in Filter Controls
You can consider a navigation control as an accessorial control for filter controls and use it to deal with the value selection operations in all the filter controls in the same report.
To insert a navigation control into a report
- Position the mouse pointer at the allowed report location where you want to insert the navigation control.
- Do one of the following:
- From the Components panel, drag the Navigation Control icon
 in the Web Controls category to the destination.
 - Navigate to Insert > Web Controls > Navigation Control.
- Navigate to Home > Insert > Web Controls > Navigation Control.
- From the Components panel, drag the Navigation Control icon
A navigation control is a combination of three buttons:
- Back
You can select this button to go back to the previous value selection status and refreshes the report data accordingly. - Clear
You can select this button to remove all the value selection histories and all the filter conditions based on the selections, and refreshes the report data accordingly. - Forward
You can select this button to go forward to the next value selection status and refreshes the report data accordingly.
By default, Designer displays the three buttons as normal buttons. You can change their button type to Image Button as follows:
- Select the target button, right-click it and navigate to Button Type > Image Button on the shortcut menu.
- In the Image Button dialog box, select Browse to specify the path or type the URL of the image source in the text box.
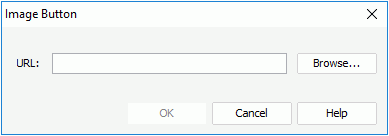
- Select OK to confirm.
If you want to get back the normal button type, you just need to right-click the target image button, and select Normal Button from the Button Type submenu.